Social Login
“Social Login” Documentation by “WPWeb”Introduction
WP e-Commerce Social Login extension allows users to login and checkout with social networks such as Facebook, Twitter, Google, Yahoo, LinkedIn, Foursquare, Windows Live.
It has been proven countless times that the easier it is for a customer to create an account during checkout, the more likely they are to complete their purchase. This extension makes the WP e-Commerce checkout process another notch easier for customers that prefer to login via their favorite social networks.
Features:
- One click registration.
- Ability to sends newly created account details to user's email.
- Auto Integrate on checkout page.
- Includes a shortcode [wpsc_social_login] that can be used to place the social login buttons on any page, as well as a widget that can be used in any widget area.
- Ability to set custom redirect URL on which user will get redirected after they login with social media.
- Admin can change the order of social networks buttons by drag and drop.
- View number of sign-ups for each social network.
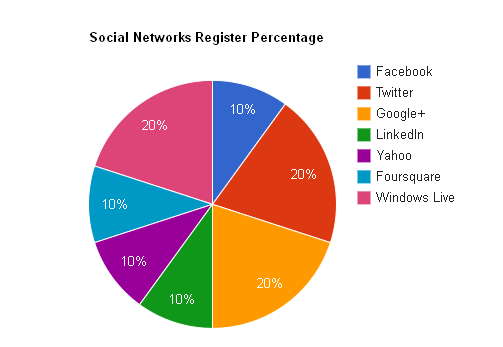
- Generate Pie graph for Social Networks Register Percentage.
- A clean & user friendly admin UI to manage everything.
Installing the Plugin
- The installation of the plugin is just like any other plugin installation for WordPress. Login to your WordPress site and go to Plugins > Add New.
- At the Install Plugins Page click on Upload from the top navigation and then click on browse.
- Go to the location on your computer where you saved the downloaded plugin zip file and upload this zipped file. You need to unzip the file first to get the plugin zip file.
- Now click on Install Now.
- Wait until WordPress has uploaded the file. If it's done click on Activate Plugin.
- Now you should see a message 'Plugin activated' at the top of the window.
After installing the extension, a social login tab will be added to the WP e-Commerce Settings.
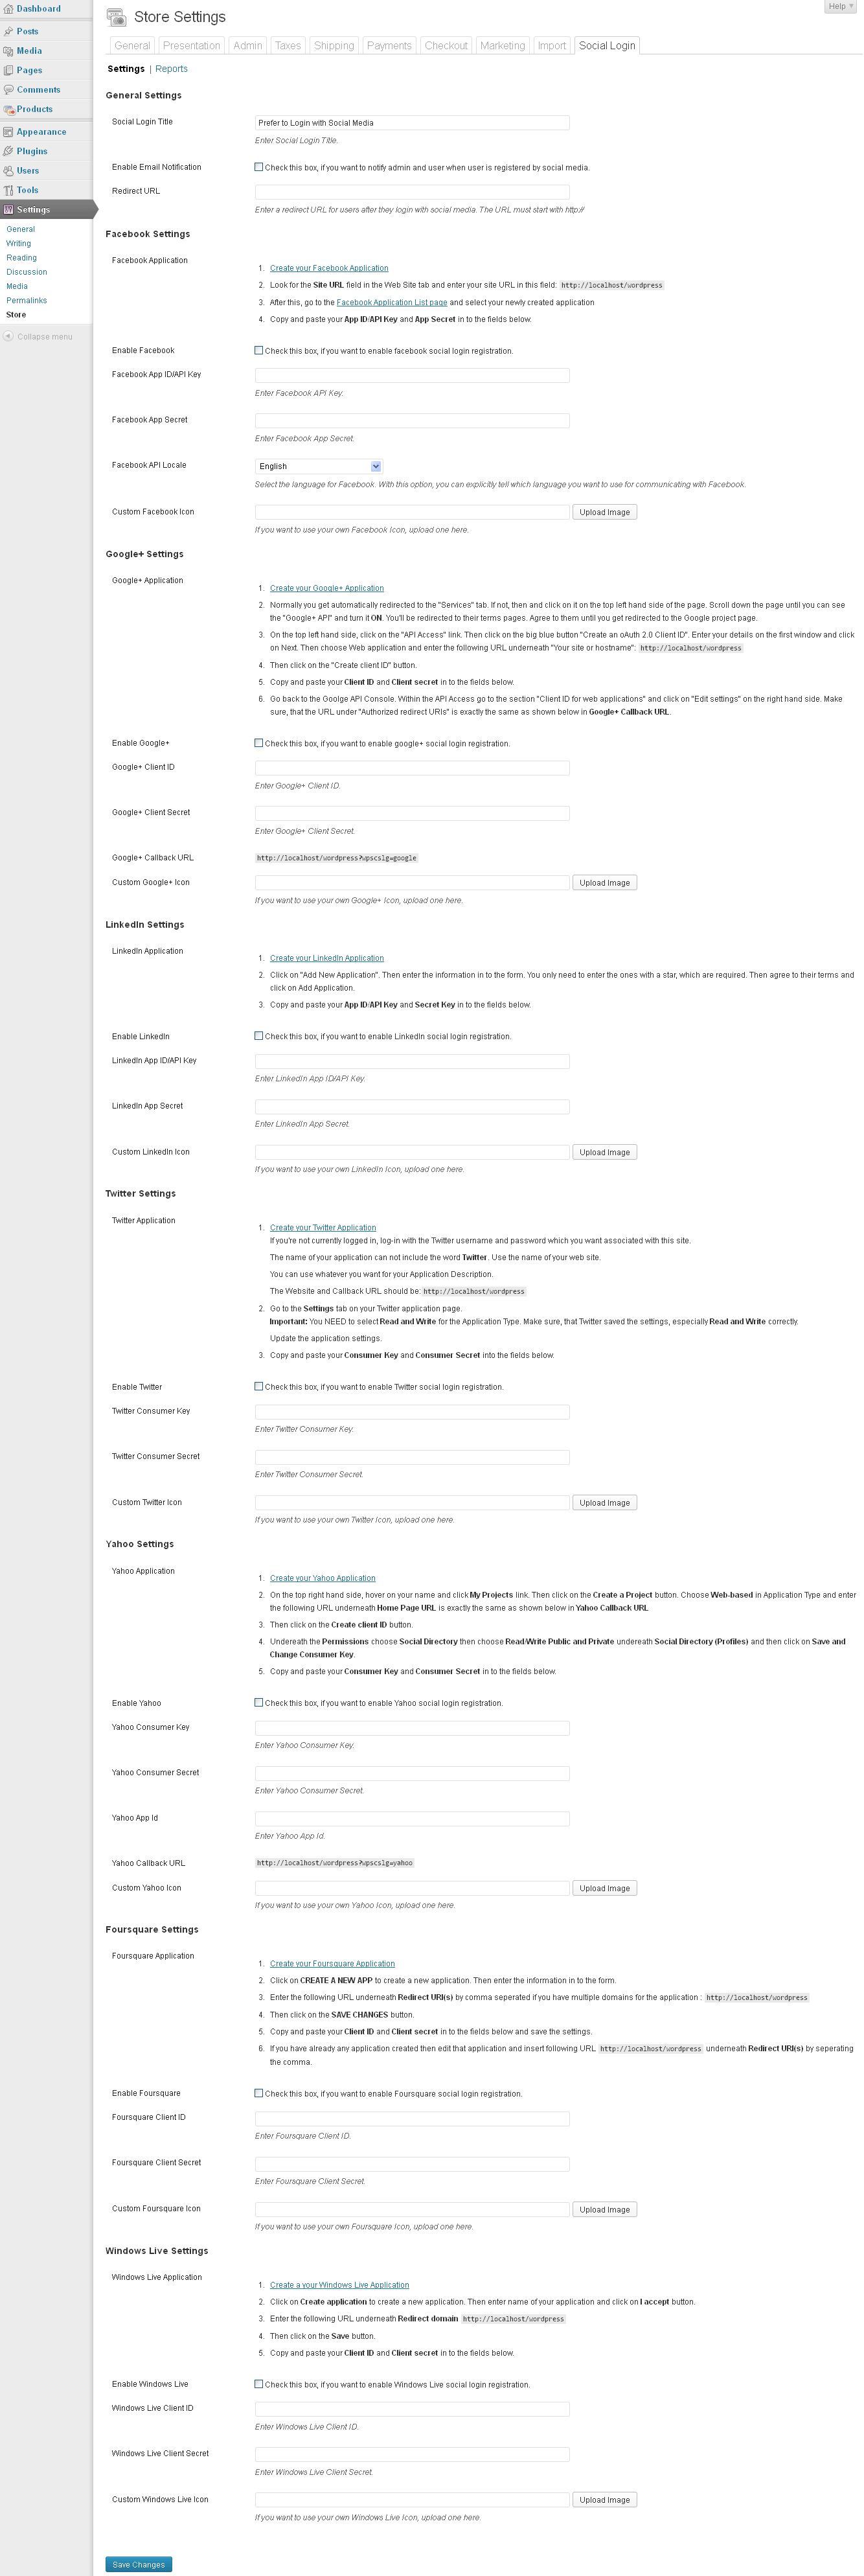
The Plugin Settings
General Settings
Social Login Title
Enter Social Login Title which will be displayed on checkout page above the social media buttons.
Enable Email Notification
Check this box, if you want to notify admin and user when user is registered by social media.
Redirect URL
Enter a custom redirect URL for users after they login with social media. Leave it blank to use current page URL.
Facebook Settings
Here you have the ability to choose Enable Facebook, Facebook App ID, App Secret, API Locale and Custom Facebook Icon (If you want to use your own Facebook Icon).
Google+ Settings
Here you have the ability to choose Enable Google+, Google+ Client ID, Client Secret, Custom Google+ Icon (If you want to use your own Google+ Icon).
LinkedIn Settings
Here you have the ability to choose Enable LinkedIn, LinkedIn App ID, App Secret, Custom LinkedIn Icon (If you want to use your own LinkedIn Icon).
Twitter Settings
Here you have the ability to choose Enable Twitter, Twitter Consumer Key, Consumer Secret, Custom Twitter Icon (If you want to use your own Twitter Icon).
Yahoo Settings
Here you have the ability to choose Enable Yahoo, Yahoo Consumer Key, Consumer Secret, Yahoo App Id, Custom Yahoo Icon (If you want to use your own Yahoo Icon).
Foursquare Settings
Here you have the ability to choose Enable Foursquare, Foursquare Client ID, Client Secret, Custom Foursquare Icon (If you want to use your own Foursquare Icon).
Windows Live Settings
Here you have the ability to choose Enable Windows Live, Windows Live Client ID, Client Secret, Custom Windows Live Icon (If you want to use your own Windows Live Icon).
Adding a widget
If you want to attach a widget that shows all social login options, enter the administrator panel, then go to Appearance and click Widgets.
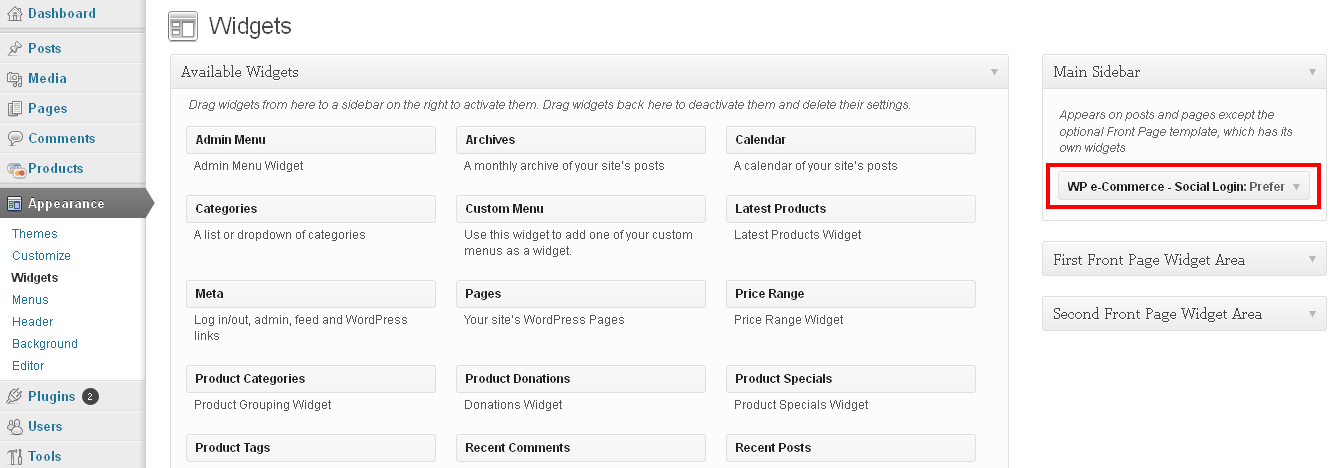
Find the "WP e-Commerce - Social Login" widget and drag it to your desired place. You can title your widget (this will appear above the social buttons).
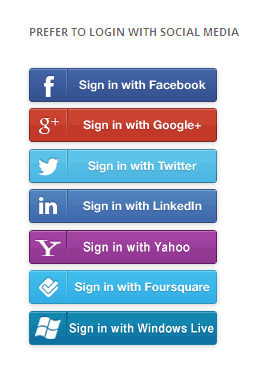
After you setup the widget, Widget will look something like the one shown in the image below on the frontend. It depends on the settings you used.
Adding a Shortcode
To integrate the social login into any page or post you can use the [wpsc_social_login] shortcode. You will see a social login icon within the WordPress editor, just as shown in the image below.
Click on the social login icon and a new window with the custom settings will pop up as shown in the image below.
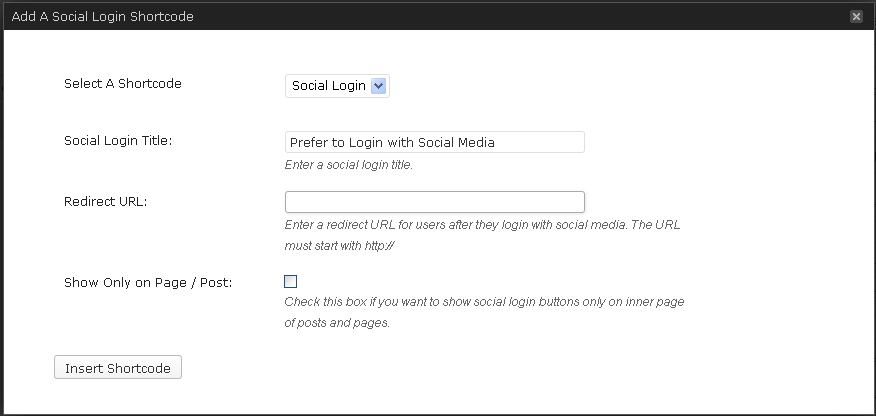
Social Login Title
Enter Social Login Title which will be displayed above the social media buttons.
Redirect URL
Enter a custom redirect URL for users after they login with social media. Leave it blank if you want to use redirect URL from the plugins settings page.
Show Only on Page / Post
Check this box if you want to show social login buttons only on single post/page.
Social Login Frontend
After inserted shortcode it will look something like the one shown in the image below on frontend. It depends on the settings you used.

Social Login Report Page
Admin can change the order of social networks buttons by drag and drop interface and view number of sign-ups for each social network as shown in the image below.

Generate Pie graph for Social Networks Register Percentage.
Frontend Behavior - top
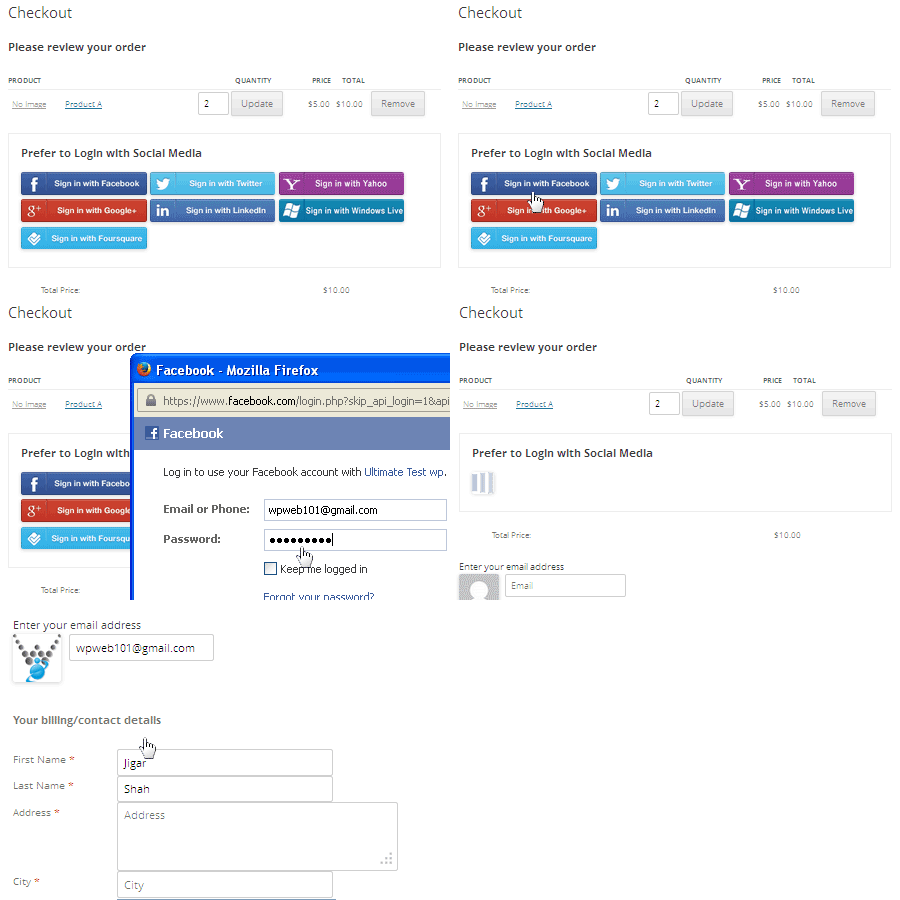
Here's a .gif of the frontend user experience :
By: WPWeb
Email: support@wpweb.co.in