Zombaio Payment Gateway
“Zombaio Payment Gateway” Documentation by “WPWeb”Introduction
Easy Digital Downloads Zombaio is a payment gateway plugin that extends Easy Digital Downloads, allowing you to take payments via Zombaio.
Installing the Plugin
- The installation of the plugin is just like any other plugin installation for WordPress. Login to your WordPress site and go to Plugins > Add New.
- At the Install Plugins Page click on Upload from the top navigation and then click on browse.
- Go to the location on your computer where you saved the downloaded plugin zip file and upload this zipped file. You need to unzip the file first to get the plugin zip file.
- Now click on Install Now.
- Wait until WordPress has uploaded the file. If it's done click on Activate Plugin.
- Now you should see a message 'Plugin activated' at the top of the window.
After installing the extension, a Zombaio section will be added to the Easy Digital Downloads Extensions tab.
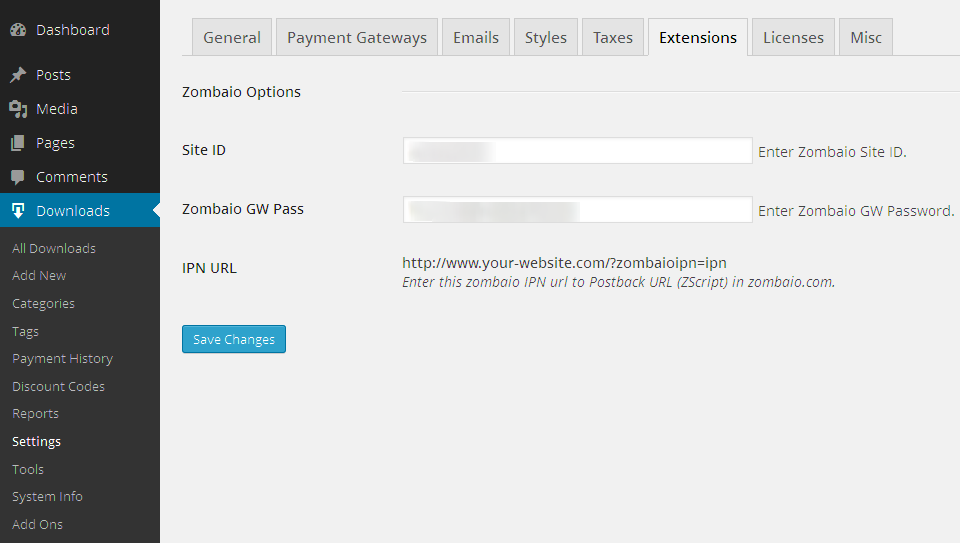
The Plugin Settings
Site ID
You must enter Zombaio Site ID.
Zombaio GW Pass
You must enter Zombaio GW Password.
EDD Ipn URL
Once you save Site ID and Zombaio GW Pass, you will be able to see IPN URL the one which you need to provide in Zombaio as Postback URL (ZScript). IPN URL only get validated by Zombaio if you have added correct Site ID and GW Pass from zombaio.
Note: If you are running a test or development version of your site the URL may reference a location Zombaio can't access such as http://localhost/... or http://127.0.0.1/... In these cases, you will need to provide Zombaio with an URL that can access your test website. Instructions on how to do this are beyond the scope of this guide.
Zombaio Plugin Setup and Use
EDD Zomabaio Plugin Setup and Use
The EDD Zomabaio plugin uses the Zomabaio IPN notification functionality to update your site with any purchases made through Zomabaio.
Zombaio Website Management Setup
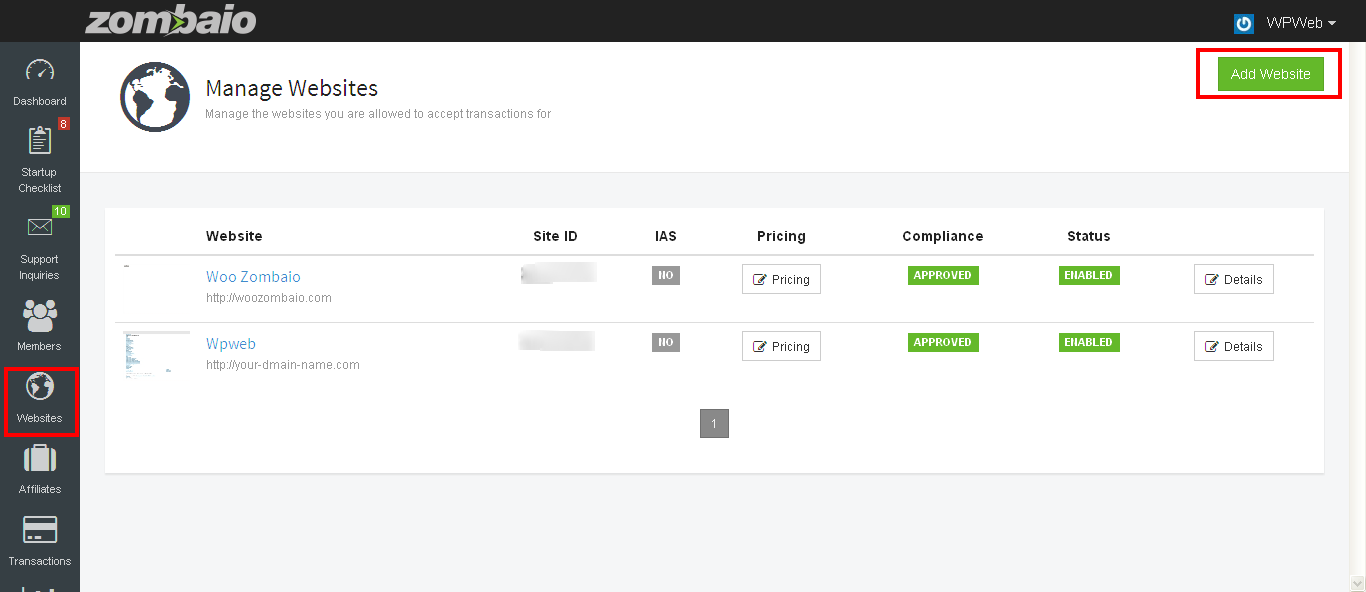
You need to create a website for your EDD Products. To create a new website, go to Websites menu and click on "Add Website" button as below screenshot:
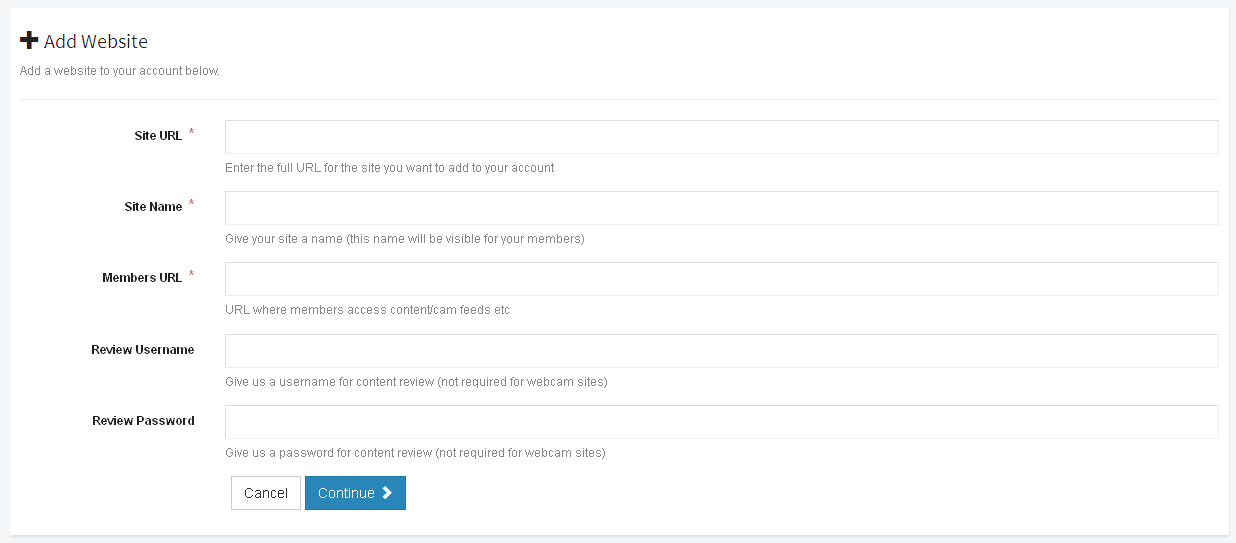
After click on "Add Website" button you will be redirected on "add website" form as mentioned in the below image:
After creating a new website, you can get your Site ID and GW password from "General Details" tab as below image:
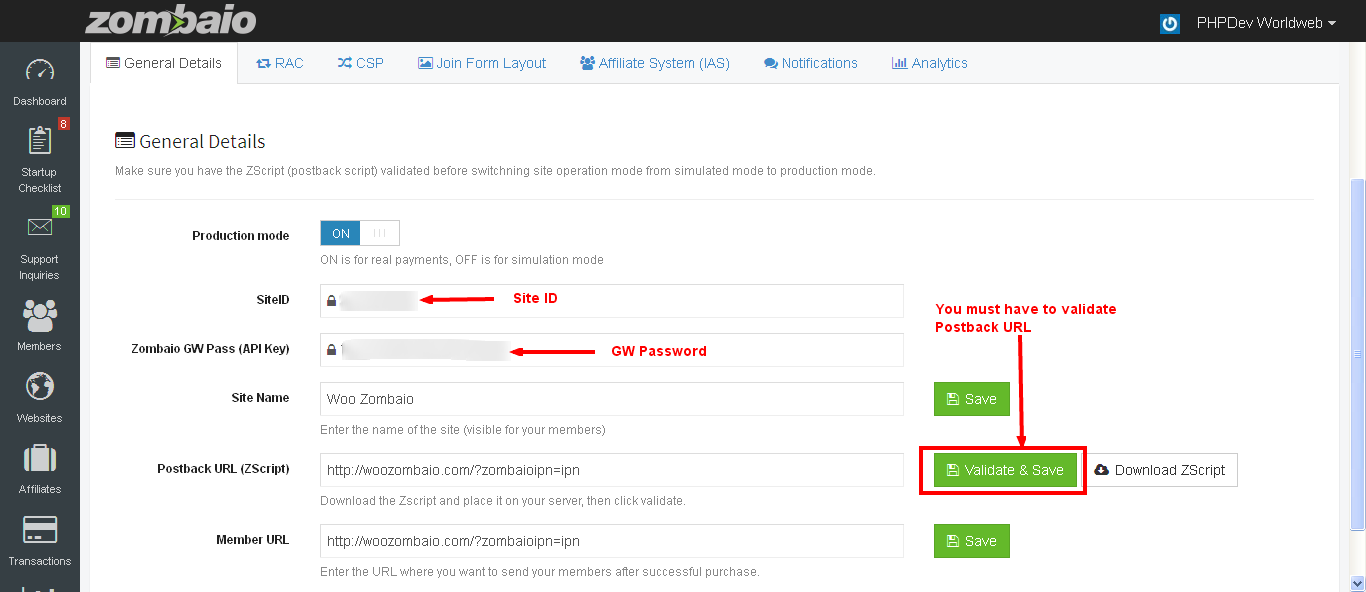
In above settings, you have to enter your postback URL and have to validate that URL. You can copy your EDD Ipn URL from global settings EDD Ipn URL and paste it in Zombaio postback URL.
Zombaio Pricing Structure Setup
You need to create a different pricing structure for your products. You can create new pricing structure from "Manage Websites" page by click on "Pricing" button as shown in below image:
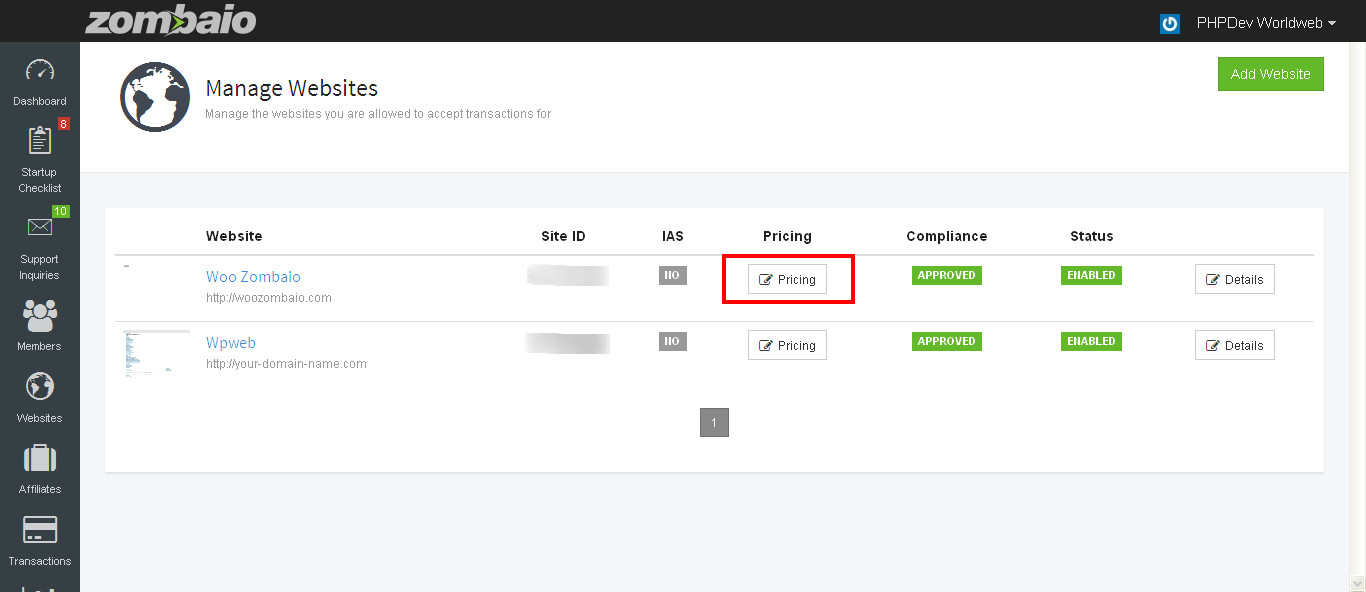
After click on "Add Pricing" button, you will be redirected to add pricing structure page as mentioned in below image:

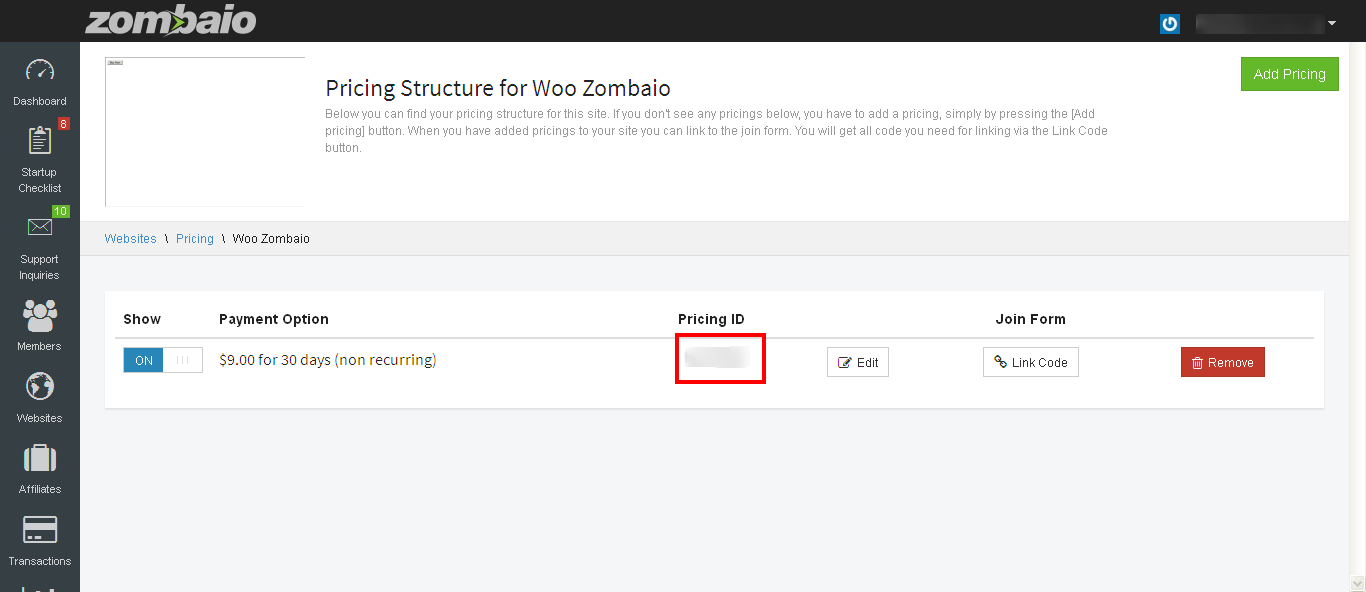
you will get the pricing id (which you will need to set in EDD product), from above page as mentioned in the image.
EDD Product Setup
To integrate the Zombaio into any download you can use the [edd_zombaio] shortcode. You will see a zombaio icon within the WordPress editor, just as shown in the image below.
Click on the zombaio icon and a new window with the custom settings will pop up as shown in the image below:
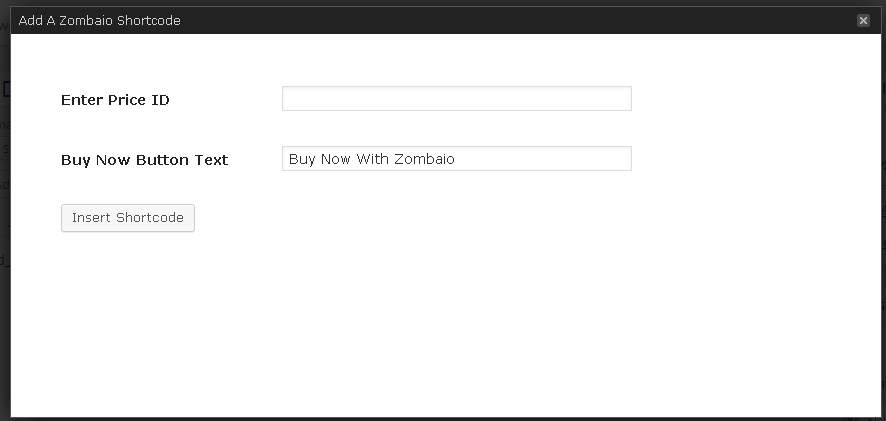
Price Id
Enter price id which you will get as show in the screenshot above from the Zombaio pricing structure "Join Form URL" field.
Buy Now Button Text
Enter your Buy Now Button Text.
Zombaio Frontend
After inserted shortcode, it will look something like the one shown in the image below on frontend.

By: WPWeb
Email: support@wpweb.co.in